How to Adjust the Auto RTH Altitude on DJI Drone
Peter Leslie
22 May 2026

The Auto RTH Altitude slider is the single value that decides whether a DJI drone clears the trees on the way home or plants itself in a branch. It lives in the same place on every current DJI drone — inside DJI Fly, under Safety, in the RTH Settings block — and the click path does not change between models.
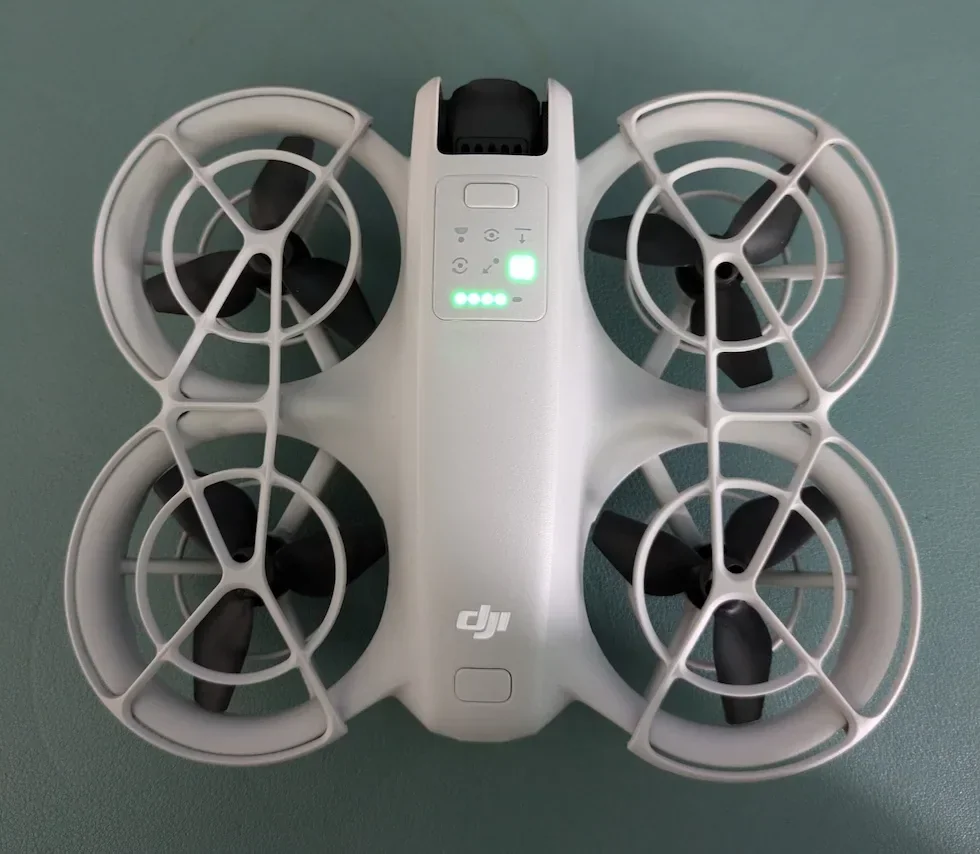
Drones this applies to
DJI Neo 2, DJI Mini 5 Pro, DJI Avata 2, DJI Air 3 Pro, DJI Mavic 4 Pro. The same procedure works on any drone running DJI Fly v1.21.2 or later — only the slider range varies.
Quick guide
To adjust the Auto RTH Altitude on a DJI drone, go to DJI Fly → Settings → Safety → RTH Settings → Auto RTH Altitude. Drag the slider to a value that sits above the tallest obstacle on the likely return path, then close the panel. The change is live straight away — no restart and no power-cycle.
Step-by-step: How to Adjust the Auto RTH Altitude on DJI Drone
Follow these top to bottom the first time, and the path is muscle memory the second time. The screenshots are taken on a DJI Neo 2, but the labels and order are identical on every drone in the callout above.
Open the DJI Fly Settings menu from the camera view
With the drone connected and DJI Fly on the camera view, tap the Settings icon in the top right of the screen. The settings panel slides in with the category tabs down the left.
Tap the Safety category in the Settings panel
Safety is the second tab down the left of the settings panel, below Control. Tap it and the right-hand pane updates to show every safety-related option for the connected drone.
Scroll down to the RTH Settings section inside Safety
Scroll past Max Altitude and Max Distance until the RTH Settings sub-heading appears. The Auto RTH Altitude slider is the first item in that block on every current drone.
Locate the Auto RTH Altitude slider in the RTH Settings block
The slider has the model name written underneath it and shows the current value in a small numeric box on the right. The range varies by drone — check the per-drone table below if you are about to push the slider to the right and it stops earlier than you expected.
Drag the slider to your chosen altitude
Pick a value above every obstacle on the likely return path — trees, masts, buildings, power lines — not just the launch point. The RTH path is a straight line back to the home point at the altitude you set, so anything taller than that value is in the firing line. UK drone pilots should also keep the value at or below 120 metres to stay inside the Drone Code limit.
Close the Settings panel to save the new altitude
Tap outside the panel or hit the back arrow. The change is live immediately — no restart and no power-cycle. The Auto RTH Altitude shown on the panel is what the drone will climb to the next time RTH triggers, whether you started it yourself or it kicked in on low battery or signal loss.
Peter's tip
Walk the site before you take off and look up — not at the launch point, but along the line back to where you took off from. Pick the tallest object on that line, add a 10-metre buffer, and set the slider to that number. The drone does not see the trees behind it during RTH on the smaller models, so the slider value is doing all the work.
Auto RTH Altitude slider range by drone
The click path is identical across the current DJI line-up. The numbers under the slider are not. Here is what the slider accepts on each model in the callout above.
| Drone | Auto RTH Altitude range |
|---|---|
| DJI Neo 2 | 10 m to 120 m |
| DJI Mini 5 Pro | 20 m to 500 m |
| DJI Avata 2 | 20 m to 120 m |
| DJI Air 3 Pro | 20 m to 500 m |
| DJI Mavic 4 Pro | 20 m to 500 m |
The 500-metre upper end on the larger drones is a global figure. UK drone pilots still have to fly inside the 120-metre Drone Code ceiling no matter what the slider lets you do, so treat 120 metres as the upper bound for any return-to-home set on a UK flight site.
Frequently asked questions
What is the default Auto RTH Altitude on a DJI drone?
DJI Fly ships every current drone with a conservative default in the lower end of the slider — close to the model minimum on a fresh install. That is well below the height of mature trees and most buildings, so set it deliberately before every new flight site rather than trusting the default.
What altitude should I set for Auto RTH on a DJI drone?
Set it above the tallest obstacle on the likely return path — not just above the launch point. The RTH path is a straight line back to the home point at the altitude you set, so anything taller than that value is in the firing line. For a typical UK garden or park with mature trees, 30 to 40 metres is a sensible floor. For built-up areas with masts, chimneys, or tower blocks on the return path, push higher.
Does the slider go higher than 120 m on every drone?
No. The maximum varies by model. The DJI Neo 2 and DJI Avata 2 cap the slider at 120 metres — matching the UK Drone Code limit. Larger drones such as the DJI Mini 5 Pro, Air 3 Pro and Mavic 4 Pro raise the cap to 500 metres because they are sold globally and the slider has to cover non-UK markets where the legal ceiling is higher. UK drone pilots still have to fly inside the 120-metre Drone Code limit no matter what the slider allows.
What is the minimum Auto RTH Altitude on a DJI drone?
It depends on the drone. The Neo 2 floors at 10 metres; the Mini 5 Pro, Avata 2, Air 3 Pro and Mavic 4 Pro all floor at 20 metres. Below the floor the drone would have very little vertical clearance over typical garden obstacles, so DJI does not allow lower values.
Does the Auto RTH Altitude apply when Failsafe RTH triggers automatically?
Yes. The same slider value is what the drone climbs to whether you triggered RTH yourself, Smart RTH kicked in on low battery, or Failsafe RTH triggered because the controller signal was lost. There is one altitude setting for all three trigger modes on every current DJI drone.
Why is my drone still hitting branches during RTH even with the altitude set high?
Two usual causes. Original Route RTH flies the line you set, regardless of what is on it. Advanced RTH plans a path using the vision system but only when the light is good enough; in low light it falls back to Original Route. Either way, if the obstacle is taller than the value you set in the slider, the drone will fly into it. The Neo 2 and Avata 2 have no full forward obstacle sensor coverage in RTH, so the slider is doing all the work.
Can I cancel RTH if the drone is heading the wrong way?
Yes. Inside DJI Fly during RTH, tap the on-screen RTH icon to exit, or press the RTH button on the remote controller again. Exiting RTH returns full control to you. If you are not confident the recorded Home Point is accurate, cancel Auto RTH and fly the drone home manually.
Does the Auto RTH Altitude slider behave the same in DJI Fly and DJI GO 4?
This article covers DJI Fly, the app every current DJI drone uses. Older drones running DJI GO 4 — the Mavic 2 Pro, Mavic 2 Zoom, Phantom 4 — keep a similar slider in a similar place, but the menu labels and slider range differ. If you are flying a DJI GO 4 drone, the click path described here will not match exactly.
The Auto RTH Altitude slider is the single most important safety setting on a current DJI drone, and it is the one new owners change least often. Build it into your pre-flight habit — walk the site, look up, pick a value above the tallest thing you can see on the return path — and the drone gets home on its own every time.
Got a site where the RTH path is unusually tight, or a question about how this slider interacts with Smart RTH on low battery? Drop a note to peter@hiredronepilot.uk and I will come back to you directly.
References
Primary source material for this article is the official DJI user documentation for each drone in the callout and the UK Civil Aviation Authority Drone Code. External links open in a new tab.
- DJI Fly — App download and release notes · The app where the Auto RTH Altitude slider lives across every current DJI drone. Release notes record any menu reshuffles between versions.
- DJI — UK consumer drone product line-up · Per-drone user manuals carry the Auto RTH Altitude slider range under §RTH Settings.
- UK Civil Aviation Authority — The Drone and Model Aircraft Code (CAP2320) · 120-metre maximum flight altitude in the UK Open category, which sets the practical upper bound for any UK return-to-home altitude regardless of what the slider allows.
Peter Leslie
Founder & GVC Drone Pilot
Peter is the founder of HireDronePilot. With thousands of logged commercial flight hours, he writes about drone technology, commercial surveying tactics, and UK aviation compliance.
Connect on LinkedIn