
Setting up a brand-new drone like the DJI Neo can feel overwhelming at first glance, with its various components and software requirements. However, the initial setup process is designed to be straightforward and is a critical first step to ensure safe and successful flights.
This guide will provide a clear, step-by-step walkthrough for preparing your DJI Neo, from unboxing to configuring its essential safety settings.
Key Takeaways
- 1To begin setting up the DJI Neo, first, unpack the drone, remove the gimbal protector, and plug it into a USB-C charger to wake the battery from hibernation mode.
- 2To control the DJI Neo, download the official DJI Fly app from the appropriate app store for your smartphone and install it.
- 3To activate the DJI Neo, power on the drone and remote controller, connect your phone, and follow the on-screen instructions within the DJI Fly app to register the device and update to the latest firmware.
- 4To prepare the remote controller for flight, securely attach the control sticks from their storage slots and extend the holder to mount your smartphone.
- 5To ensure a safe flight, open the safety settings in the DJI Fly app to confirm you have a strong GPS signal and set a Return-to-Home (RTH) altitude that is higher than any surrounding obstacles.
Wake and Charge the Battery
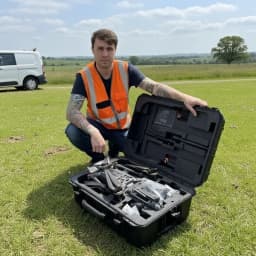
To begin setting up the DJI Neo, you first need to prepare the Intelligent Flight Battery. When new, these batteries are in a hibernation mode to preserve their health and must be "woken up". Unpack your DJI Neo, remove the gimbal protector by gently pressing it and pulling it away from the camera, and then connect the drone to a USB-C charger. The battery is successfully activated once the LED indicators light up. It is essential to let the battery charge fully before proceeding, as the subsequent activation and firmware update processes require sufficient power.
Download and Install the DJI Fly App
To control the DJI Neo, you will need to use the DJI Fly app on your smartphone. The app is not just for flying; it's also where you will activate the drone, update its firmware, and manage all of its settings. Download the DJI Fly app from the official app store for your iOS or Android device. Once installed, you will need to either log in to an existing DJI account or create a new one, as this is required for the activation process.
Activate the DJI Neo and Update Firmware
To activate the DJI Neo, power on the drone and the remote controller using the standard "press, then press-and-hold" method. Connect your smartphone to the controller, and launch the DJI Fly app. The app will automatically detect the new DJI Neo and guide you through the activation process. This involves binding the drone to your DJI account. Immediately following activation, the app will almost certainly prompt you to install a firmware update. This step is mandatory and crucial for performance, safety, and enabling all the drone's features, so ensure you complete the download and installation before attempting your first flight.
Prepare the Remote Controller
Preparing the remote controller is a quick but important physical step. Take the two control sticks, which are typically stored in slots at the bottom of the controller, and screw them into their mounts on the front. Next, pull out the integrated phone holder at the top and clamp your smartphone securely into place. Finally, use the appropriate cable to connect your phone to the remote controller so the DJI Fly app can communicate with it.
Configure Safety Settings in the DJI Fly App
To ensure a safe flight, you must configure the drone's safety settings before your first takeoff. With the drone and controller powered on and connected, go to the camera view in the DJI Fly app and navigate to the "Safety" tab within the settings menu. The most critical setting to configure is the Return-to-Home (RTH) altitude. You must set this altitude to be higher than any potential obstacles in your flying area, such as trees, buildings, or hills. This ensures that if the RTH function is triggered, the DJI Neo will ascend to a safe height before flying back to its takeoff point, preventing a collision.
Conclusion
Following these essential setup steps will ensure your DJI Neo is properly prepared and safe for its maiden voyage. From waking the battery and updating the firmware to configuring the critical Return-to-Home safety feature, this initial process lays the foundation for every successful flight that follows. By taking the time to complete this setup correctly, you can move forward with confidence and begin exploring the creative capabilities of your new drone.
Frequently Asked Questions
How do I install the propellers correctly?
The propellers are designed to be installed on specific motors. You will see markings on both the propellers and the motor arms. You must match the marked propellers to the marked motor arms, and the unmarked propellers to the unmarked motor arms. To install, press the propeller down onto the motor and twist it in the direction indicated by the lock symbol until it is secure.
What should I do if the firmware update fails?
If a firmware update fails, ensure all devices (drone, controller, phone) remain powered on and that your phone has a stable internet connection. Restart the DJI Fly app and attempt the update again. If it continues to fail, try restarting the drone and controller. A persistent failure may require you to connect the drone to a computer and use the DJI Assistant 2 software to refresh the firmware manually.
Why won't my DJI Neo connect to the remote controller during setup?
The most common reason for a connection failure during initial setup is mismatched firmware. Even if your controller and DJI Fly app are up to date, the drone itself needs its own firmware update right out of the box. Ensure you complete the drone's firmware update as the very first step after activation, as it will often not connect properly until this is done.
Do I need to calibrate the compass or IMU before my first flight?
You should not need to calibrate the compass or IMU (Inertial Measurement Unit) right out of the box. The drone will prompt you in the DJI Fly app if a calibration is required. A compass calibration is needed if you have traveled to a new location far from your last flight or if you receive a compass error warning, often caused by magnetic interference. An IMU calibration is only needed if the drone drifts or the app specifically prompts for it.
What is Beginner Mode and how do I turn it off?
Beginner Mode is a default safety feature that limits the drone's speed, altitude, and flight distance. It is designed to help new pilots learn to fly in a controlled environment. To disable it, you must go into the settings within the DJI Fly app once your drone is connected.
Do I need a microSD card for the initial setup?
No, a microSD card is not required to complete the initial setup, activation, or firmware updates. However, you will need a compatible microSD card installed in the DJI Neo to record any photos or videos.
How do I set up the batteries from the Fly More Combo?
If you have the Fly More Combo, you will need to wake each of the three Intelligent Flight Batteries from hibernation mode individually. You can do this by inserting each one into the drone and connecting it to a charger, or by placing all three into the charging hub and connecting the hub to power. The hub will then charge the batteries sequentially, starting with the one that has the highest charge level.
What should I do if the gimbal doesn't move correctly during startup?
When the DJI Neo powers on, the gimbal should perform a self-check, moving through its full range of motion. If the gimbal fails this check, appears stuck, or is tilted, power off the drone immediately. First, ensure you have removed the gimbal protector. Then, check for any debris obstructing the gimbal's movement. If the issue persists, it may be a hardware problem requiring a recalibration via the app or professional service.
Why does the app say I'm in a restricted zone during setup?
DJI's GEO system uses geofencing to prevent flights in sensitive locations like airports, which are marked as red restricted zones. If you are in one of these zones, the drone will not be able to take off. You will need to move to an unrestricted area to complete your setup and first flight.
What are the essential pre-flight checks after setup is complete?
Before every flight, you should perform a quick pre-flight check. Ensure the propellers are securely attached and undamaged, the battery is fully charged and clicked into place, and the gimbal protector is removed. After powering on, check the drone's status in the DJI Fly app to confirm you have a strong GPS signal, the Home Point has been updated, and there are no error warnings.